Monday, March 31, 2014

Learning About Spring

Welcome Spring!
We did lots of activities this week, however I didn't take many pictures because it was a little to chaotic this week with everyone being here full time!  Everyone was having adjustment periods - including me!

Here are a few activities that we did do!  Enjoy!


Gross Motor:  
Puddle Jumping: I cut some "puddles" out of blue construction paper and the boys jumped from puddle to puddle. First we jumped from one to one, the. We tried jumping further and skipping puddles in between.  A great way to jump and move in the house when you live places where Spring takes a LITTLE longer to arrive.


Intellectual:
Sequencing from seed to food.  I used a template for this from one of my books, however you could easily find pictures from the internet and make your own sequencing activity.


Art:
Flower Printing
I bought some fake flowers from the dollar store and they served three purposes.  
1. I used them as a decoration in a vase for my Easter display.
2. We sketched them one afternoon and drew some beautiful pictures.  Sorry there are no pictures for this activity.  It was a busy day with full time daycare in full gear.
3. I cut off a few petals and put out some paint for the boys to dip and dab (or smear) and they turned out really cute!


Friday, March 28, 2014

Puzzle Storage

Puzzles are a huge hit in our house!  We have SO many puzzles, I wouldn't even be exaggerating when I say we have around 50 puzzles - that would be a low number.  Most of the puzzle are kept in the daycare room for everyone to play with.  The boxes that the puzzles came in were falling apart, getting stepped on and the tape just wasn't holding up anymore.  I also had wooden puzzles that came with just a platform, so they didn't store well at all unless they were completed.

So with a little help from the Dollar Store (have I ever mentioned I love that place???) I finally organized our puzzles.  At first, I used baggies and put all of the pieces into those.  But I quickly found that the kids just couldn't close the baggies properly and the pieces always fell out. 

I found these pencil cases with zippers and knew they were the perfect solution!  On the backs of each of the puzzle pieces (if not already done) I wrote a  word/drew a shape so that if they were all dumped out together they would be easier to sort out in the end.


Once all of the puzzles were put in the pencil cases, they were placed into this basket by our quiet table so that they are easily accessible.  I love these cases because they are very compact as well.  It may not look like it, but there are three layers of pencil cases in this basket.


Thursday, March 27, 2014

Cataloging Books

So how many KIDS books do you have in your house?  Do you know what they are?  Do you get frustrated in trying to find the right book when you are trying to teach something and then forget that you have that AWESOME book to help you out?  That's me.  It's easy enough to go to the library and find books that fit a theme, but before that step, I want to use what I have in my house . . . which apparently is 356 children's books.  That's not even all of them, because I didn't count my daughters princess books, nursery rhyme, poetry or chapter books.  I found this app to help me catalogue all of those books and I love how easy it was. 

You can scan the barcode (and for the most part, it works, there were some older books, books from book orders or books from the Dollar Store that didn't register) and up pops the picture, subject, title, information, author, etc.  I didn't like the subjects that it gave me, so I came up with new ones that were related to my teaching themes, but you don't have to do that if you don't want to. 

If the book doesn't register you have to take a picture and add the title and subject on your own, but that's minimal in comparison to all the time and energy this app will save you in the long run.

Hope this information has been helpful! 

Oh and best part, the app is FREE!

Wednesday, March 26, 2014

Painting Snow


Yay for warmer weather and being able to get the kids outside.
In the past, I have tried spray painting snow with coloured water in spray bottles, but that always turns into a very frustrating activity with all the mittens, jackets and cold weather.  I will never give up and will try that another day, however today, we painted the snow with paint.  Yep, just basic paint from the Dollar Store, placed in cups (of course to match the colour) and used our regular paint brushes (the biggest ones).  Easy.  Fun.  Exciting!


Tuesday, March 25, 2014

Graphing with Shapes

This week our learning focus included


Circles
White
Jj
10


Math: We have been talking a lot about graphs lately - it all started a couple of weeks ago when we created our weather graph as a part of our Weather Week.  Check that out here!  Today we created a graph using shapes and then using colours.  Simple and fun and lots of learning involved.


Here are the books that we used this week!
Uniwai and Hunaahi a Story of the Hawaiian Rainbow by Aaron T. Watene
Purple, Green and Yellow by Robert Munsch
A Baby's First Word Book of Colours by Jo Joof
Let's Say Our Colors (Priddy Books)
The Magic School Bus Makes a Rainbow by Joanna Cole
Chameleon's Crazy Colors by Nicola Grant

Also this week I have been finding songs and little rhymes on YouTube and creating playlists according to our themes.  We started last week with St. Patricks Day and the kids loved the music SO much that I thought I would try and incorporate these little videos every week.  So here is a playlist with fun songs about Rainbows!

Enjoy!


Monday, March 24, 2014

Rainbow Theme


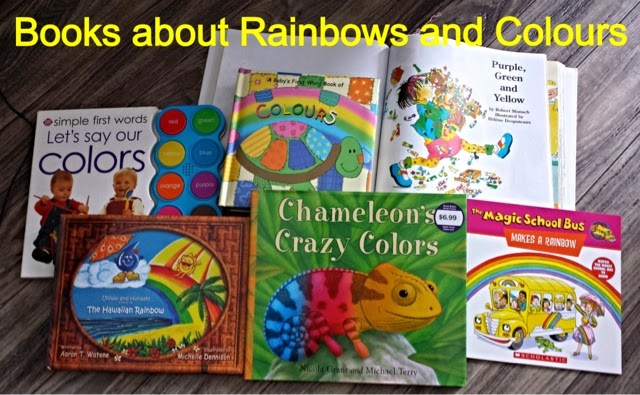
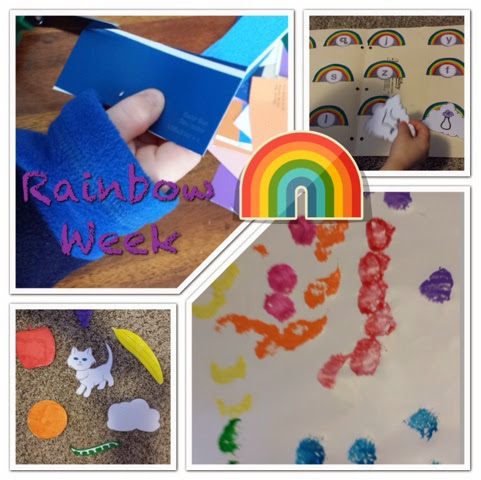
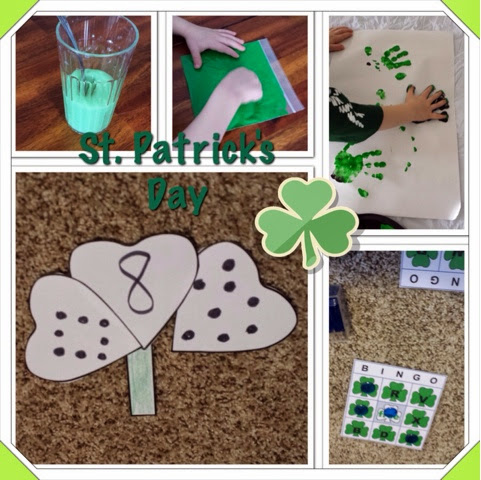
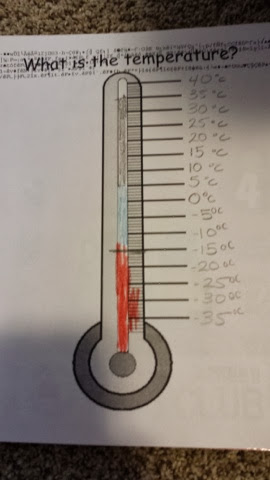
So after we finished St. Patrick's Day, the only real logical next step was to learn about rainbows. Because of the age of my boy, I tied in learning about rainbows with learning about colors and the mixing of colors to make new ones.


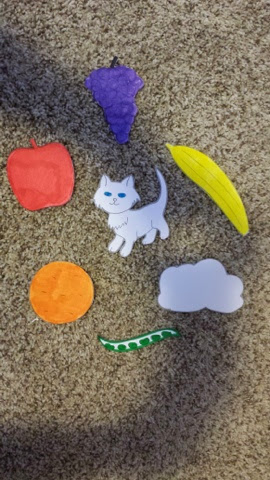
Literacy: I cut out different shapes and colored them to go with a poem that I found.  You could also turn these pieces into a felt board story if you so wish.  Here's the poem.
Colors
Red, red.  I see red.
It's an apple growing overhead.
Yellow, yellow.  I see yellow. A big banana, long and mellow.
Orange, orange.  Can it be?
An orange growing on a tree.
Blue, blue.  I see blue.  My kitten's eyes - she says, "Mew, mew."
Green, green.  I see green.
From my garden, one string bean.
Purple, purple.  What do I see?
Grapes on a vine, just for me.
White, white.  I see white.
Fluffy cloud, so soft and light.


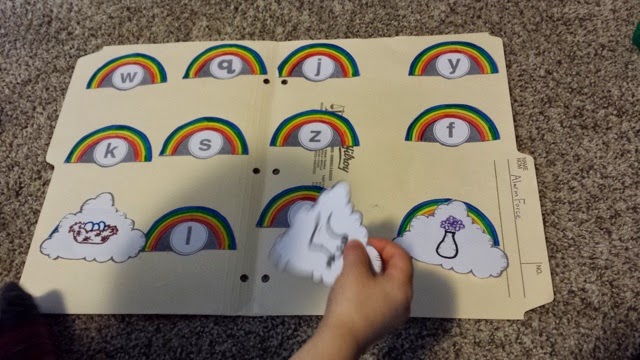
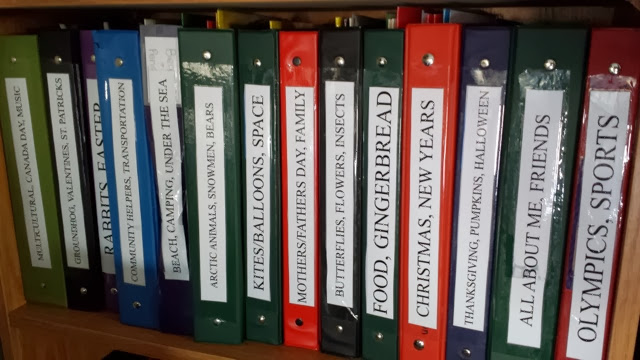
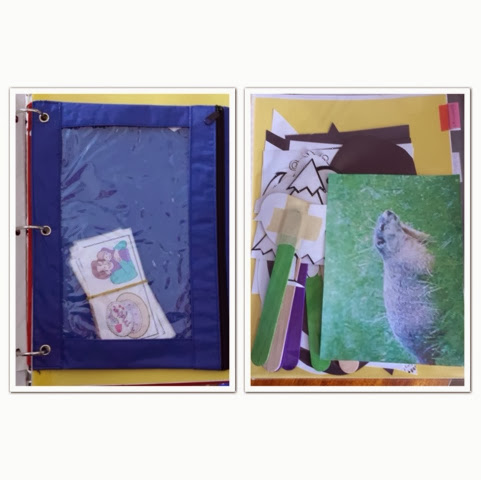
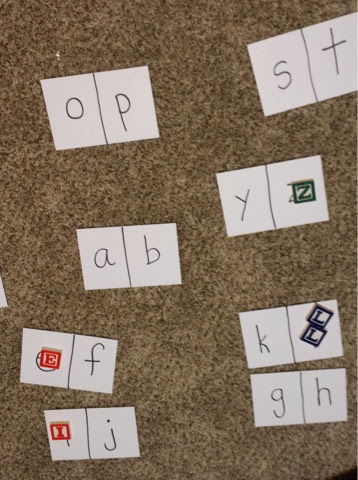
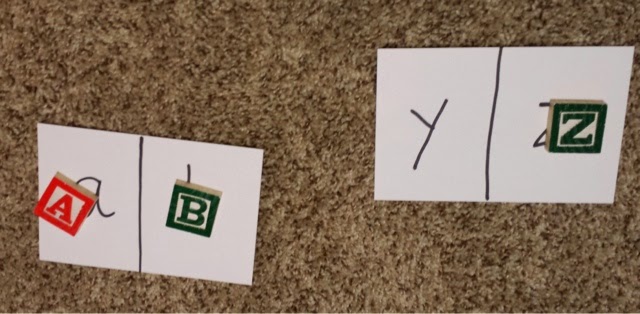
Literacy: I found this file folder game in one of my books and made it for this special week. It teaches the beginning sounds of words so that children can match the pictures to the lowercase letters.  If you don't have a book with file folder games, I highly recommend you purchase one because they are a great tool for teaching and learning. You can check out this website for great file folder books and printables.


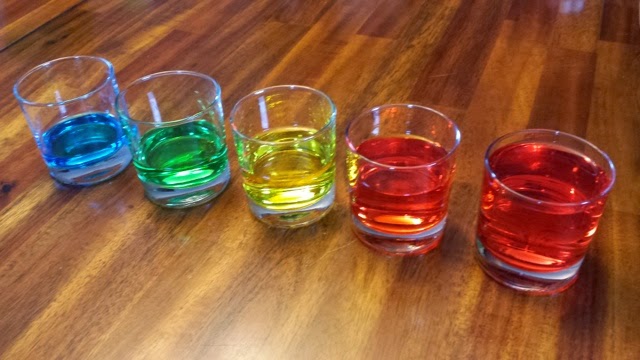
Music: We made a xylophone and then learned about the mixing of colors to make a rainbow.  We talked about the order of the colours in a rainbow.


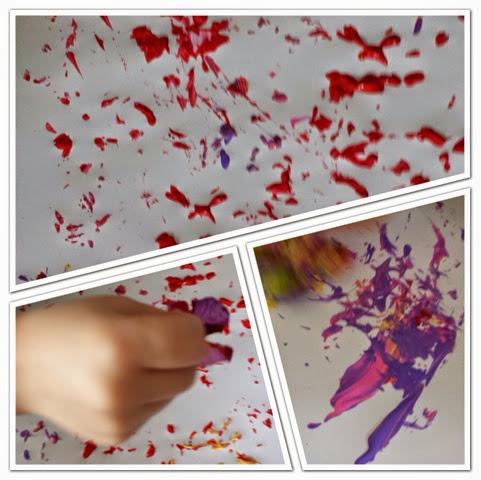
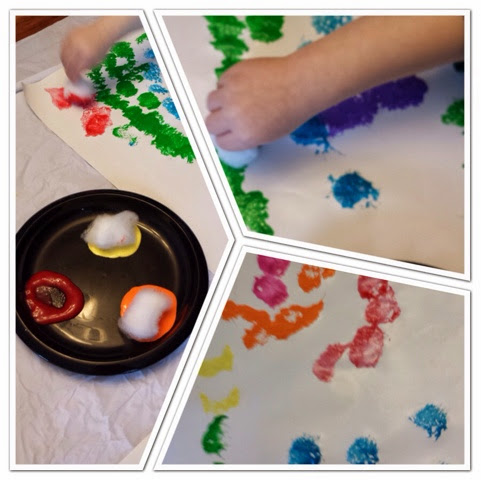
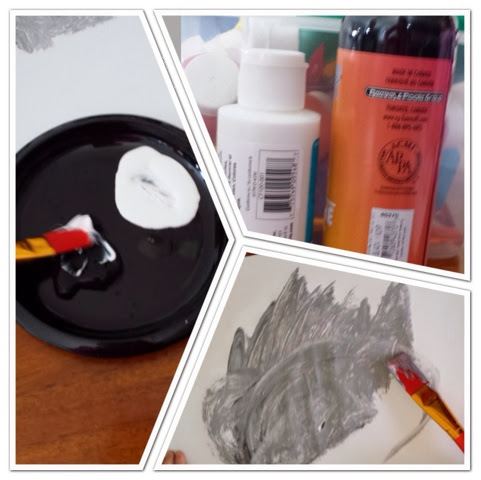
Art: Rainbow Painting with Cotton Balls
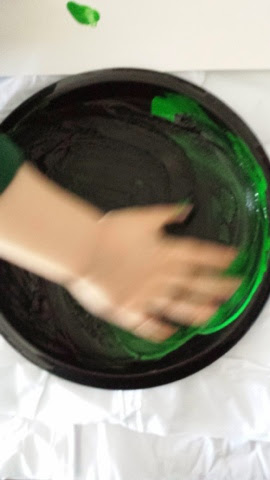
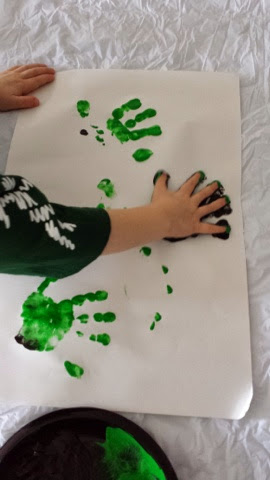
This art project was very easy to set up and clean up.  We talked together about the many different colours of paint that we would need to create a rainbow.  I then put a cotton ball in each colour and let the children dab and spread the paint onto their paper. 


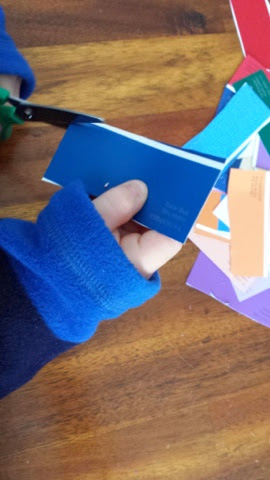
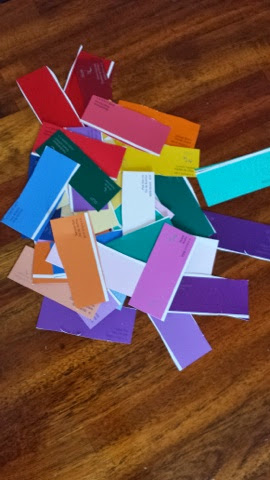
Fine Motor: Cutting Paint Chips
This was a two part activity, however only the first part worked out. 
Part One:
The kids worked with their little scissors to cut along the white lines on the paint chips.  Once this was done, they sorted and mixed the paint chips according to their colours.  They had fun mixing and matching and seeing the differences in colours (light blue to dark blue and all the other blues in between for example)
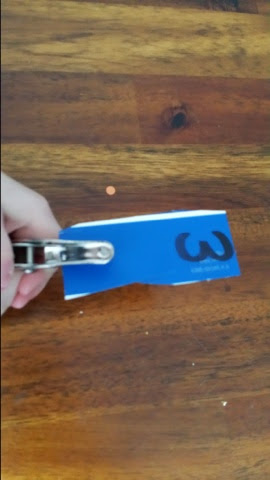
Part Two:
I printed numerals onto the paint chips that they had cut out and gave my boy (4 years old) a single hole punch.  The goal was to punch out the correct number of holes.  He tried SO hard to squeeze the hole punch, but he just couldn't do it.  It caused a lot of frustration so I highly recommend NOT doing this activity with children unless they are older (probably 7 or 8) because the paint chips are just too thick.

Friday, March 21, 2014

Pizza Muffins


Ingredients:
1tbsp yeast
1tbsp white sugar
2 1/2 cups warm water
2tbsp oil
1tbsp salt
6cups flour
pizza sauce
pizza toppings
shredded cheese

Directions:
  1. In a large mixing bowl, dissolve the yeast and sugar in the water, till creamy, about 10 minutes
  2. Stir the oil, salt and 4 cups of the flour into the yeast mixture
  3. Mix in the remaining flour, 1/2 cup at a time
  4. Knead dough for about 8 minutes, add some oil to the dough ball, cover with a tea towel and let rise for 1 hour
  5. Preheat oven to 425F
  6. Once the hour is up, divide the dough ball into two or three smaller balls.  Roll each ball out, one at a time, onto a floured surface
  7. once dough is roller out, cover with pizza sauce and add toppings
  8. Roll up the dough and cut into pieces (like you would for a cinnamon bun) and place them on a cookie sheet
  9. Bake for 20 minutes or until light brown and cheese is bubbly


Thursday, March 20, 2014

Snowball Targets

FINALLY I think Spring might be here!

We have been spending TONS of time outside in the yard these past few days and doing some awesome Pinterest finds!  Here we have some snowball targets.  Probably best done on a wooden fence if you have one, but the side of our little deck worked just fine for us.  Make sure you go over the rules with your kids (and your significant others if you have one that acts like a child as I do) so that no one (especially mommy) gets hit with snowballs . . .

Wednesday, March 19, 2014

Theme Storage


Storing ideas and activities for Preschool Themes can be a very consuming idea.  I struggled with how to organize all of my material for a long time.  I finally figured out a plan that would work for me.  I had most of the binders already at home, but they are cheap at the Dollar Store and don't be afraid to spend the money if it means you will be more organized!

Each binder is labeled with the theme or themes that are inside.  This will change as time goes on and more material gets added, but this is how mine started.  I created labels (you can find them here) and then used packing tape to stick each label on the binder.

Then I started to place all of my materials in the binders.  At the beginning of each binder, I place my schedule from all previous times that the theme was used.  This reminds me what I have already done and what worked well.


To cut down on how many Pinterest Boards I have, I also take a screen shot of my boards and print those off.  I have to be careful about what I pin so that the activity is very self explanatory in the picture or description.  If a website is needed, it may be beneficial to add that to the description.


Once the binders were put together, I still had many activity books that I had collected from garage sale over the years, full of theme activities.  I went through each of those books and ripped out the pages, then hole punched them and placed them into the corresponding binder.  So far, this has worked really well for me and I don't have as many books sitting on my shelves taking up space.  If you do this, one piece of advice would be for you to write down the books before you throw out the empty shell because then you can reference the books if you need.


After all of the pages were added, I purchased page protectors and pencil cases (with binder holes) to keep my game pieces in.  I highly recommend the pencil cases because they have the zippers, however the page protectors do hold more.  Both of these items can be found at the Dollar Store.


And that is how I organize my theme printables for preschool/daycare!  I hope I have provided you with at least some inspiration!


Tuesday, March 18, 2014

sticker shapes and letter matching

This week our topics of learning included
Circles
Ii
9
Black


Small Motor: I drew shapes for my little guy (my daughter drew her own) and they used up some of the MANY stickers we have in the house to make "sticker shapes".  They really turned out pretty neat and it kept them busy for a bit while I made supper.


Gross Motor, Music: Listening to music and understanding tempo and volume were the goal of this game.  A few simple rounds of hot potato.  First we talked about 2D VS 3D shapes, then we talked about the speed of the music.  If the music was slow, they had to pass the ball slow.  Fast music meant the ball could be passed at "lightning speed". Simply game, lots of learning.


Literacy: Matching uppercase to lowercase letters.  I used index cards and printed two lower case letters on each one.  We then used a bucket of old letter magnets (that have lost their magnets, but still in great shape) to match lower and upper case.  Just some recycling and learning fun happening!


Monday, March 17, 2014

St Patricks Day

Happy St. Patrick's Day Everyone!


Last week we talked all about the colour green and St. Patrick's Day!  I love these "holiday" type themes because they get my little guy really excited about upcoming events!  We always decorate the house for the holidays and special days, so that is always a part of our weekly adventures, even if I don't always take pictures of it.


Math: I found Build a Shamrock Activity printable and created a counting game for my little guy.  He is learning how to identify groups of items without counting and he can do so up to 3 so far.  This activity also helped him with his one to one correspondence of numbers, which just means counting a dot and saying a number.  Sounds easy enough to us, but it's a tough skill to learn and a lot of little ones struggle with it.  This activity ALSO works on identifying numerals.  For older children, you could adapt by using tally marks, roman numerals, ten frames, etc.  The list goes on and on!


Cooking: Our snack this week was very simple, but involved measuring and mixing of colours.  We made some instant pudding and then talked about mixing colours.  What makes green?  So we experimented first with water and once we found what made green, we added blue and yellow to the pudding and mixed!


Literacy: My son LOVED this activity when we did it a couple of weeks ago, so I thought I would bring it back with green paint for the holiday.  If you missed it last time, check it out.  He is practicing his printing and drawing skills in a whole new way . . . and it's not messy!


Art: Now this activity was not quite as clean as the last one.  We just did some very basic fingerpainting with black (our colour of the week) and green (for St. Patrick's Day).  I use a shower curtain from the Dollar Store to cover the table and the just wipe it off and reuse again and again.  I like it better than a sheet or newspaper because it is washable and stays on better.  Less wasteful as well.


Literacy: Letter recognition at it's finest!  Playing a game of BINGO.  Check out all the printables (dominos, BINGO, flashcards, memory games, etc.) at the MES English website.  I used old letter magnets as my call letters.  There are also lowercase BINGO sheets as well if that is what you are looking for.


Last but not least, the super fun St. Patrick's Day treasure hunt!  This year St. Patrick's Day falls on a Monday, so I wanted this activity to be quick and to the point so that we had time in the morning.  I plan on leaving the first note (on the left) downstairs for the kids to find.  My daughter can read it and they can find what they need then I will give them the second note.  There will be a laundry basket in the living room full of towels for them to fold and at the bottom will be a bowl of treasure!  I plan on working on my sons sorting skills during the day and then when my daughter gets home, she can practice her adding and math skills before we take it to the bank for cash.  BEST way to get rid of all those unwanted coins in mommy's piggy bank.


Friday, March 14, 2014

Cheeseburger Muffins

Cheeseburger Muffins (makes 12 large muffins)

Ingredients:
2lbs ground beef
3/4 C. bread crumbs
1/2 C. minced white onion
2 eggs
1tsp. salt
1tsp. pepper
3 C. shredded cheddar cheese

Directions:
  1. Preheat the oven to 350F
  2. Grease
  3. In a large bowl, combine all of the ingredients and mix well.
  4. Mould the beef mixture into balls and place them into the muffin tins.  Gently press down.  Make sure the mixture does not fill the muffin tin more than 3/4 full.
  5. Bake for 40 minutes or until finished.


Thursday, March 13, 2014

Technology Time

As our kids are getting older, there are so many more things that they can help with around the house. I am very grateful because both kids really enjoy helping out.  They also both really enjoy having some sort of technology time.  We don't give allowance in our home because we believe that we all live in this house and we all need to work together to keep it running smoothly.  I don't get paid to do the dishes, so why should anyone else?  As they get older and need money to buy things (not toys from the dollar store), we will give out an allowance, but we will cross that bridge when we get there.

So I came up with a list of chores (Pinterest has a LOT of great ideas) for different ages and typed it up so that I would have quick ideas, my husband would know what's going on and plus, our daughter is learning to read so she can read the list, too.  You can print the list if you wish, just scroll down to the bottom of this post!

Once the list was made, I created some technology punch cards (original idea here).  I created them myself because when I went to print, for some reason that link wasn't working.  It was quick and easy, but no fancy colours.  If you want to print some, they are also at the bottom of this post.

Now every time the kids do a chore, we highlight a number circle for them and they can save them or use them right away for time watching TV, playing on the iPad or playing a video game.  Each circle is worth 30 minutes and they are really starting to appreciate the time they get to spend with technology. 


Wednesday, March 12, 2014

Stacking Cheerios

This week our learning focus was
Star
Black
Hh
8

A great fine motor activity.  All you need is some playdough, a piece of raw spaghetti and some Cheerios.  Mould the playdough into a ball and then push it onto the table.  Then stick the piece of spaghetti into the playdough and allow your child to place the Cheerios onto the spaghetti.  This provides great small motor practice for all ages.


Check out these other blog posts for more Small Motor Ideas!


The Books We Used This Week Included:
Weather in Spring by Martha E. H. Rustad
The Cloud Book by Tomie De Paola 
If It's Really Cold . . . And Other Weather Predictions by Blake A. Hoena 
National Geographic Readers: Weather by Kristin Baird Rattini
The Magic School Bus Presents: Wild Weather by Joanna Cole and Bruce Degen 
Welcome Books: Weather Report Series by Children's Press 
           Includes Hot, Rainy, Windy, Cloudy, Cold, Sunny Days
Weather ABC An Alphabet Book by B. A. Hoena 


Tuesday, March 11, 2014

Weather Week Part 2


Science: Making Rain
Instructions:
  1. Pour approximately 3 inches of boiling water into a glass jar (I used a tall vase from the Dollar Store)
  2. Cover the jar with a plate and wait 5 minutes
  3. Put 3 ice cubes on the plate
Explanation:
The cold plate causes moisture in the warm air (caused by the boiling water in the jar).  The moisture condenses and forms water droplets.  You can compare this to what happens outside when it rains.  Warm, moist air rises and meets the colder air high in the atmosphere.  The water vapor condenses and forms precipitation that falls to the ground in the form of rain.


Sensory: We made a "Snowy Day" scene using a couple bags of cotton balls (Dollar Store) and some "snowy" animals that were a part of our collection downstairs.  On the second day of play (when I took this picture), I threw in some corks to add to the imagination in their play.  My kids imagination turned them into trees.  What will your child come up with?


Math: Rain Drop Matching Game
I made 48 raindrops and put shapes and colours on all of them.  While the children sat on their chairs, we all sang "Rain Rain Go Away" and I dropped the raindrops randomly all over the floor.  Once they were all dropped, the children raced to find all of the pairs they could.  This game can be competitive (see who finds the most pairs) or cooperative (work together to beat a specific time).


Science: Learning About a Thermometer
We watched a quick video on YouTube about thermometers and then used this printable.  We worked together to write on the numbers, then we checked our forecast for the day and the weekend.  We were on the way towards a major warm-up, so they were able to see a huge difference in temperature, which was great!  I then used the black crayon to show them what a 'summer' temperature would look like on a thermometer.


Science: What Does the Wind Blow Experiment
I created a simple table with a YES and NO column and then collected 8 random toys.  I blew each of the toys and the kids took turns filling in the table.


Art: Cloud Painting
This was my favourite activity of the week because of an event that came out of it.  I knew in advance that we didn't have Grey paint, but we would mix it.  I took out each of the paints, looking for grey and then made the sad announcement that this activity wouldn't work because there was no Grey.  My daughter (6) was quite sad and suggested we painted white clouds instead.  My son (3) looked at both of us and said in a very empathetic voice "It's OK mommy and sister!  Let's just mix the black and white and make grey on our own!"  So I went along with it and he was very excited (and his sister very proud) when it worked out!